
Getting Started
Quick start: your first invoice
Create, send and get paid on your first GST invoice in about five minutes.
This walkthrough takes you from a blank dashboard to a sent invoice with a working pay link in about five minutes. We'll assume you've already created your account and added your UPI/bank.
1. Add a customer
- 1Open the Customers tab and tap Add customer.
- 2Enter their name and (optionally) GSTIN, email, phone and address.
- 3Save. You can reuse this customer on future invoices.
2. Create the invoice
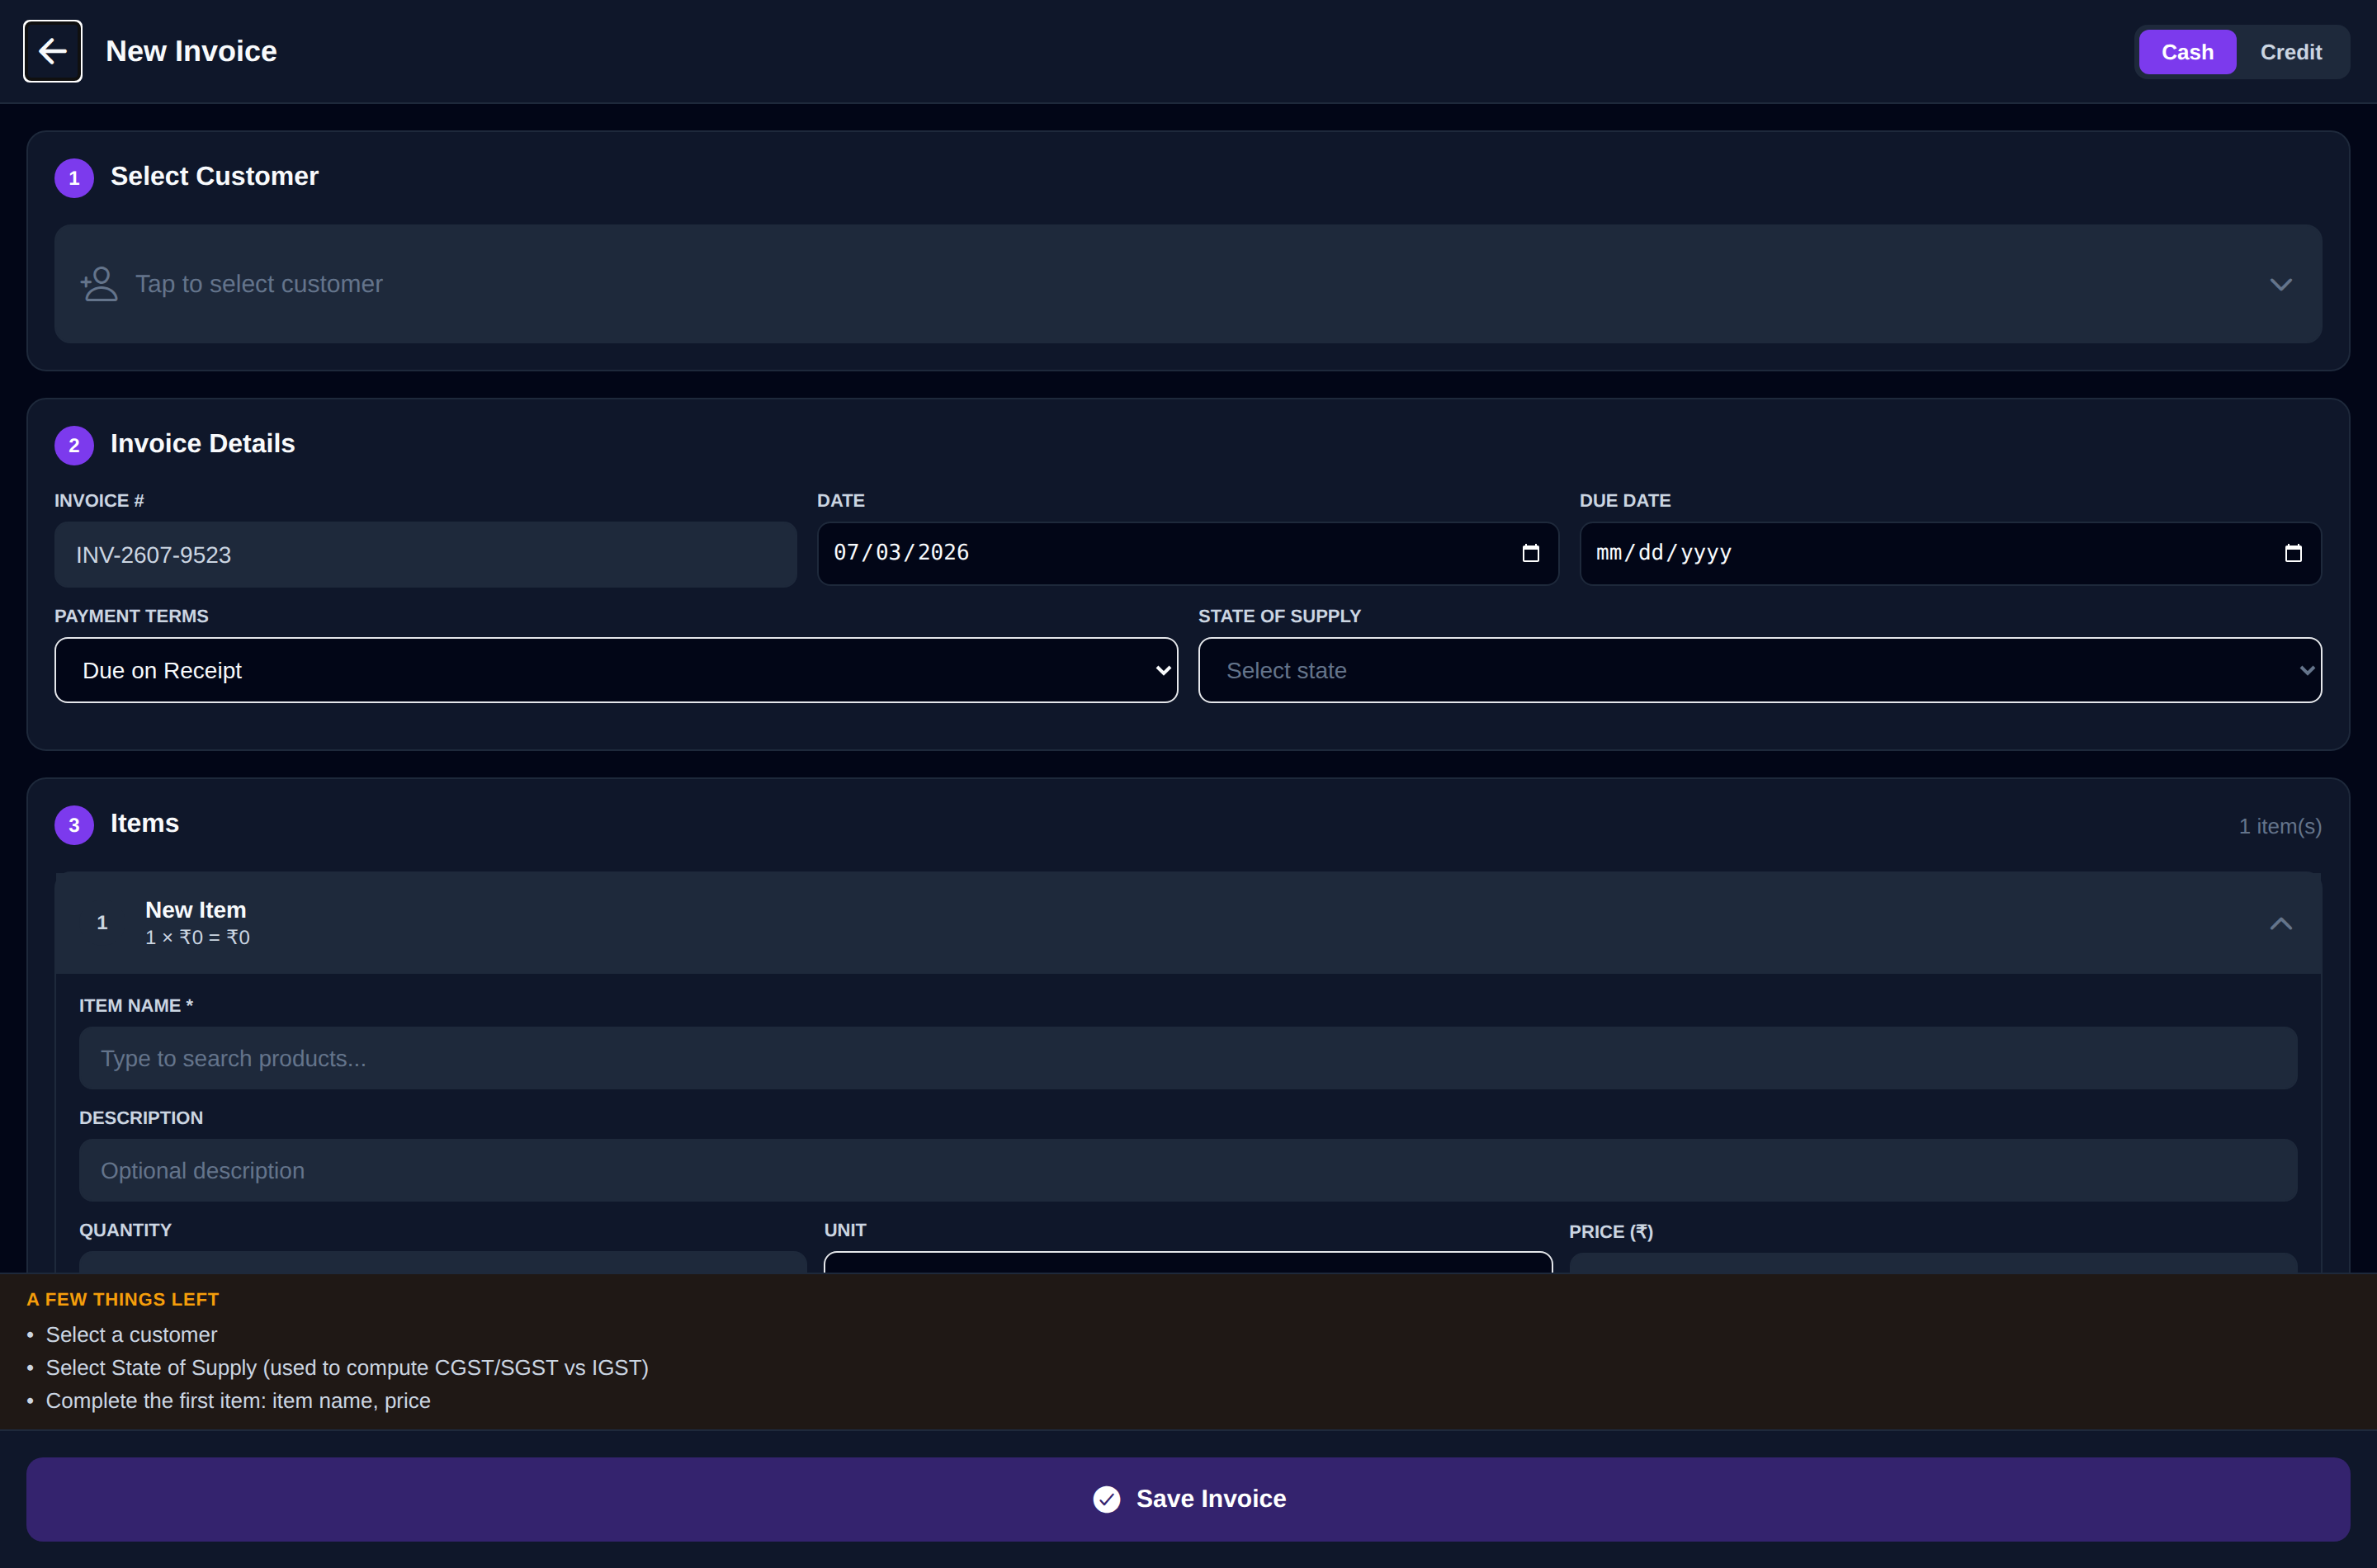
- 1Open the Invoices tab and tap Create invoice.
- 2Pick your customer, then add line items — description, quantity and rate. Set the GST rate per item (InvoiceKaro splits CGST/SGST or IGST automatically based on the states).
- 3Add a due date and any notes, then Save. Your invoice PDF is generated instantly.
invoicekaro.com/app
3. Send it & get paid
- 1From the invoice, tap Send to email it (with the PDF attached) or copy a pay link to share on WhatsApp.
- 2Your customer opens the link, sees the invoice, and pays by scanning your UPI QR or via bank transfer — directly to you.
- 3When the money arrives, open the invoice and tap Mark as paid. The dashboard updates instantly.
Tip
You can also share a pay link any time from the invoice list — tap the link icon to copy it. See Payment links.
Note